How to Open Cd Drive on Laptop Manually
The Windows Operating System assigns one letter of the alphabet to every single drive that is attached to a computer. The CD or DVD ROM that is attached to a computer is also assigned a letter and appears as a drive in My Computer and all other areas of Windows Explorer. However, the CD or DVD drive may, in some cases, disappear entirely from Windows Explorer. The drive, sometimes, won't even show up in the device manager as well. This problem is way more common than you would be inclined to think and can create serious issues especially if you need to access your DVD/CD immediately.
The error is most likely caused because of a problematic driver. If the problem started just after the Windows update then the issue might be the new driver. On the other hand, if the problem started without any change in the computer then the drivers might be corrupted or outdated. There is a slight chance that the issue is caused by a hardware problem as well. So, don't rule that out.
Here is a list of methods that will help you solve the issue.
Tips
- Make sure your DVD/CD disk drive is working. The drive should have a light in front of it. If the light doesn't blink or turn on when you insert your DVD then the issue might be a hardware one. If there isn't any light then try to hear the sound. You should be able to hear the sound of your DVD/CD spinning.
- If you do find an issue with the DVD/CD disk drive, open the casing of your system and make sure your DVD/CD drive is properly fitted and wires are connected. There shouldn't be any loose connections.
- Restart your computer. Sometimes there aren't any issues. A simple reboot of the machine fixes the problem.
- Run the Windows own built-in troubleshooter.
- Hold Windows key and press R
- Type control.exe /name Microsoft.Troubleshooting and press Enter
- Click Configure a device under Hardware and Sound
- Click Next
Method 1: Delete the UpperFilters and LowerFilters entries from the registry
There are a few registry values that you can change to fix this issue. This solution is complicated and since you are going to make some changes with a sensitive part of your system, it is better to first create a backup and have a way to come back to your current state if things go wrong.
Backup Registry
Here's how you can create a backup of your System Registry:
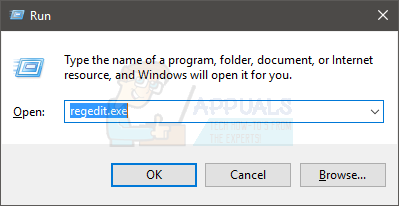
- Open the Run dialog box by pressing Windows + R
- Type regedit in the box and press Enter or click ok.
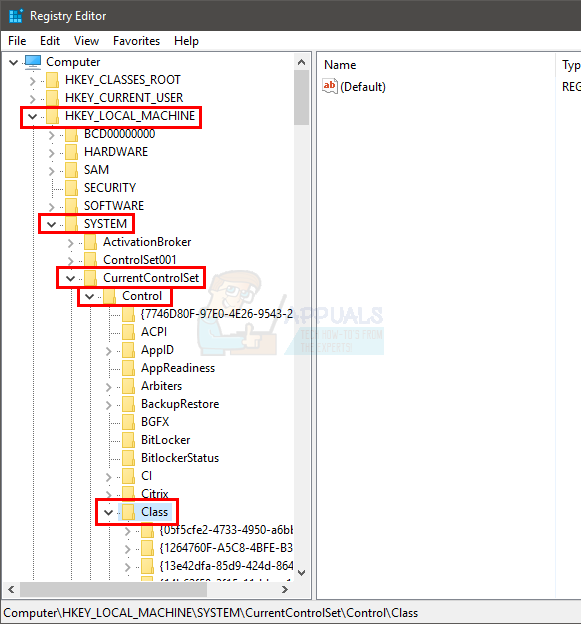
- Now, navigate to this address HKEY_LOCAL_MACHINE\SYSTEM\CurrentControlSet\Control\Class\ {4D36E965-E325-11CE-BFC1-08002BE10318}. If you don't know how to navigate to this path then follow the steps given below
- Locate and double click HKEY_LOCAL_MACHINE from the left pane
- Locate and double click SYSTEM from the left pane
- Locate and double click CurrentControlSet from the left pane
- Locate and double click Control from the left pane
- Locate and double click Class from the left pane
- Locate and single click {4D36E965-E325-11CE-BFC1-08002BE10318} from the left pane
- Select this file and then click File at the top.
- Then click Export and select the location on your system where you wish to backup this registry file.
- Assign an identifiable name to the backup and click Save to create the backup.
If you have made a mistake and you wish to recover an existing registry backup, you can do that easily by doing this:
- Open the Run dialog box by pressing Windows + R
- Type regedit in the box and press Enter or click ok.
- In the registry editor, click File from the toolbar and then click
- Go to the location where you have stored the backup file, left click the file and then click Open or simply double click the file.
Delete UpperFilters and LowerFilters strings
Now that you know how to backup and recover files and hopefully you have created a backup of the above mentioned file; let's proceed to make the changes and fix the original issue.
- Open the Run dialog box by pressing Windows + R
- Type regedit in the box and press Enter or click ok.
- Now, navigate to this address HKEY_LOCAL_MACHINE\SYSTEM\CurrentControlSet\Control\Class\ {4D36E965-E325-11CE-BFC1-08002BE10318}. If you don't know how to navigate to this path then follow the steps given below
- Locate and double click HKEY_LOCAL_MACHINE from the left pane
- Locate and double click SYSTEM from the left pane
- Locate and double click CurrentControlSet from the left pane
- Locate and double click Control from the left pane
- Locate and double click Class from the left pane
- Locate and single click {4D36E965-E325-11CE-BFC1-08002BE10318} from the left pane
- In the right hand pane, locate the UpperFilters and LowerFilters strings. If you can see the two, proceed with the following instructions, if you cannot then move on to the latter part of this solution.
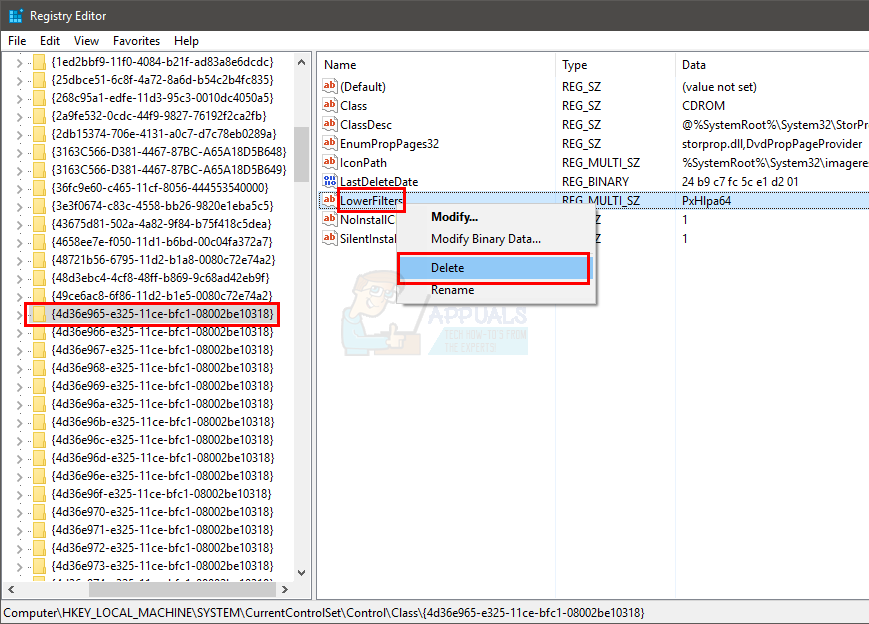
- Select both strings by holding CTRL and left clicking both of them (one by one).
- Then right click and select Delete, if prompted for confirmation press Enter.
If you cannot see the UpperFilters and LowerFilters then you will have to create the strings, here's how:
- You need to go to this path now HKEY_LOCAL_MACHINE\SYSTEM\CurrentControlSet\Services\atapi. Follow these steps to navigate to this path
- In the left pane, scroll up until you find the CurrentControlSet folder. This folder should already be expanded. If it isn't, double click it.
- Locate and double click Services from the left pane. This should be one of the subfolders of the CurrentControlSet
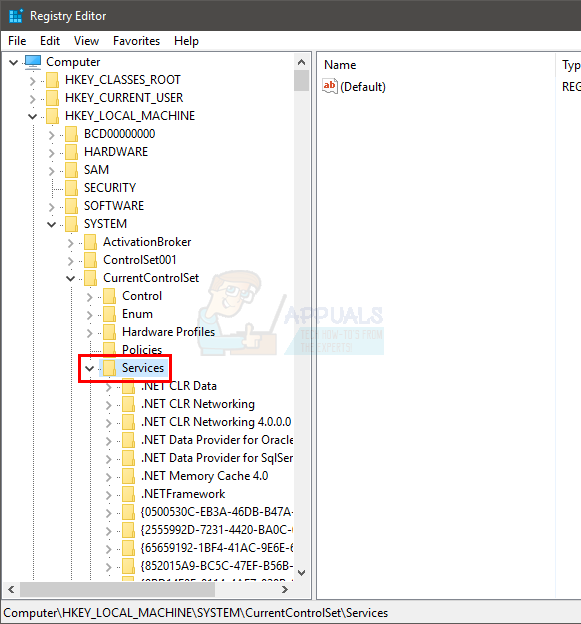
- Locate and select atapi from the left pane
- Once you click the atapi on the left hand side, move your cursor to an empty space in the right hand pane and right click.
- Click New and select Key.
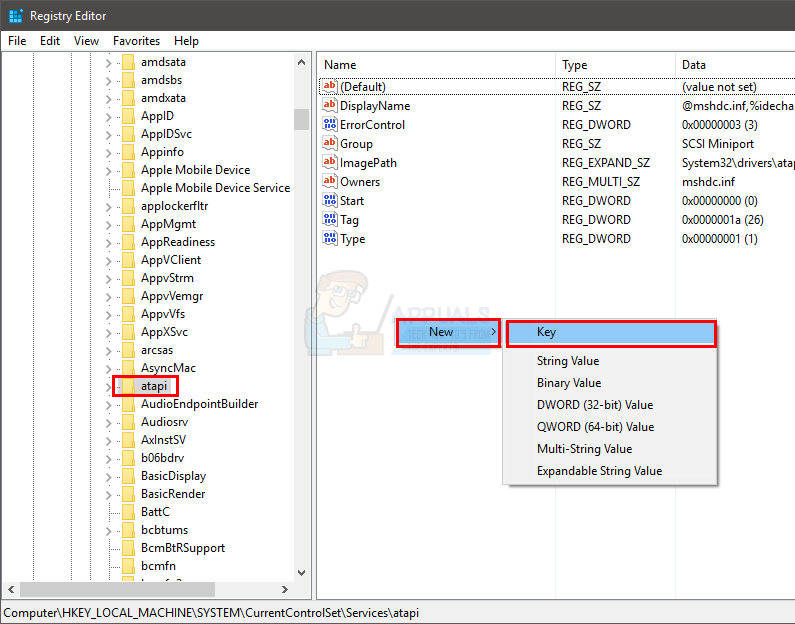
- Name this key Controller0. (This is case sensitive, so ensure the capital letters and small letters are typed exactly the same)
- Press Enter and the key will be created and it will appear under atapi on the left hand pane.
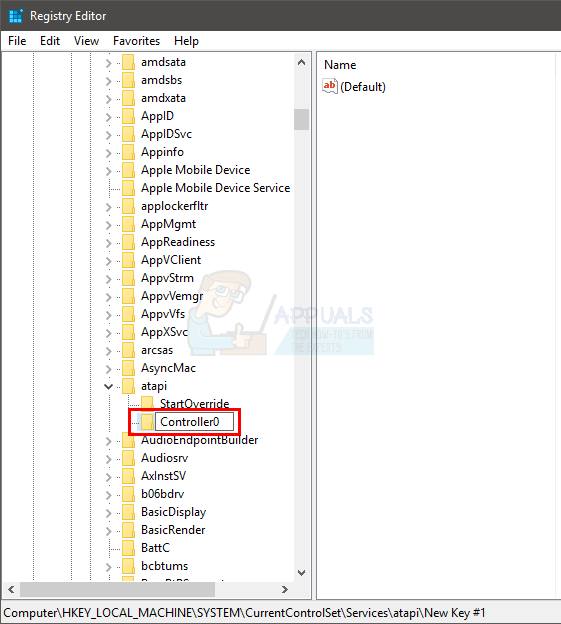
- Left click and select the newly created Controller0 (from the left pane).
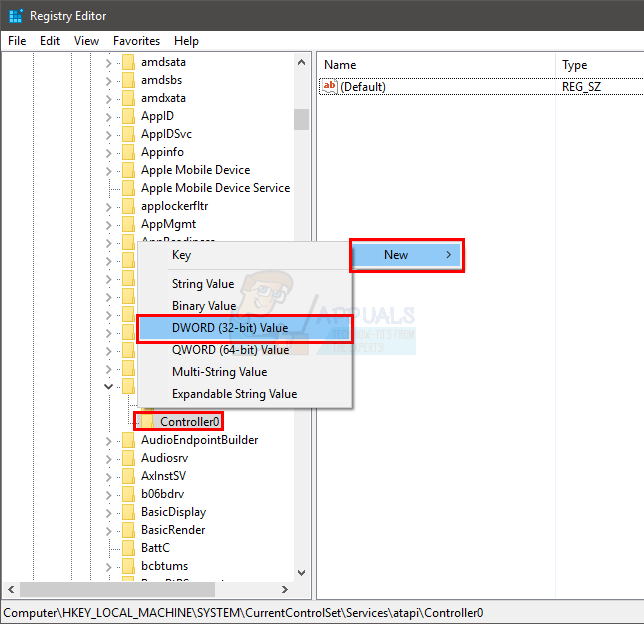
- With Controller0 selected, move the cursor back to the right hand pane and right click on an empty space.
- Click New and then select DWORD (32-bit) Value from the list.
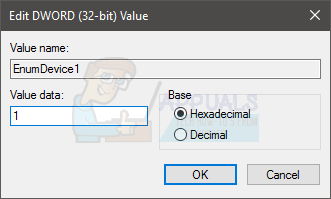
- Set the name of this variable as EnumDevice1 (This is also case sensitive) and press Enter
- The EnumDevice1 variable will appear on the right hand pane window, double click it.
- In the Edit DWORD (32-bit) Value window, under Value data insert 1; make sure that on the right hand side of this dialog box the Hexadecimal option is checked.
- Set the Value data to 1 and press Enter or click Ok.
- Exit the registry.
Restart your computer and recheck the error, hopefully your DVD drive has reappeared again.
Note: The filters are, in most cases, what causes the letter for the CD/DVD drive to disappear from Windows Explorer, which is why this is the most popular fix. If you are not too confident about fiddling around with your computer' registry, simply download this .zip file, run the .reg file inside, and it will delete the entries for you.
Method 2: Use a Microsoft Fix It Tool
Download the Microsoft Fix It tool designed to troubleshoot issues pertaining to CD and DVD drives. For computers running on Windows XP, Vista or 7, this Fix It can be found here. For computers running on Windows 8 or 8.1, this Fix It can be found here.
Run the Fix It utility.
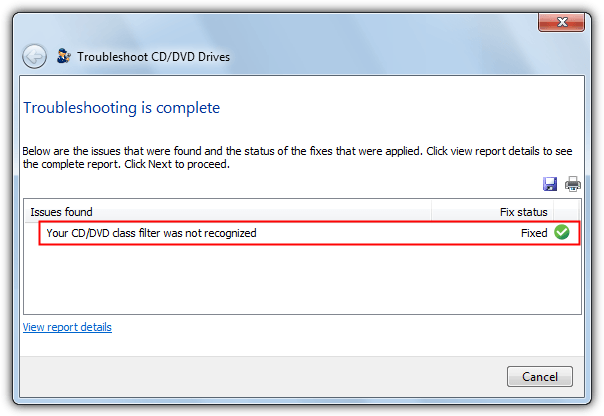
When prompted by the utility, click on Detect problems and apply the fixes for me.

If the problem is indeed caused by messed up Lower/Upper filters, the Fix It tool will detect and successfully fix the issue.
Method 3: Manually assign a letter to your CD/DVD drive
In the event that your CD/DVD drive is not visible in Windows Explorer because Windows has not assigned a letter to it, manually assigning a letter to the drive will do the trick.
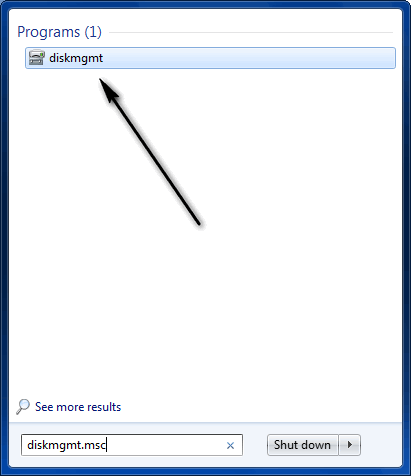
Press Windows key once
Type diskmgmt.msc into the Search bar and open the program
In the bottom half of the Disk Management window, check to see if there is no letter under CD-ROM 0 or CD-ROM 1.

If there is no letter for the CD/DVD drive, right click anywhere on or near the term CD-ROM and click on Change drive letter and paths.
Click on Add.
Open the dropdown menu in front of the Assign the following drive letter option and select a drive letter for your CD/DVD drive.

Click on OK.
Back in the Disk Management window, press F5 to execute a refresh, upon the completion of which the respective letter will have been assigned to the CD/DVD drive.
Method 4: Uninstall DVD drivers
Uninstalling your DVD drivers and then restarting your system should be the next thing on your list. Uninstalling a driver might seem illogical but the Windows have its own generic drivers for every device. So, if you reboot the system after uninstalling a specific driver, Windows will automatically install a driver for that device. Since Windows own drivers are the most compatible versions so this is bound to work.
Follow the steps given below to uninstall the DVD drivers
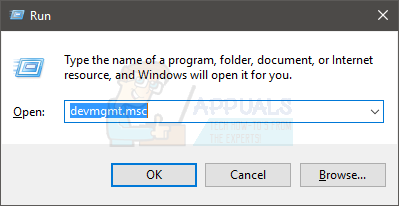
- Hold Windows key and press R
- Type devmgmt.msc and press Enter

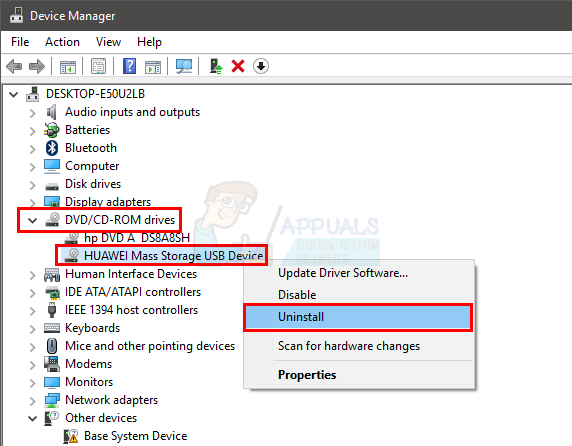
- Locate and double click DVD/CD-ROM drives
- Here, you will see your DVD/CD drivers. Right click the first driver and select Uninstall. Confirm any additional prompts. Repeat this for all the drivers you see under DVD/CD-ROM drives.
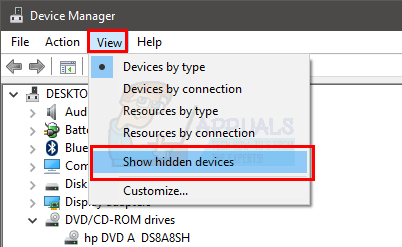
- If you can't see any driver under DVD/CD-ROM drives then click View and select Show hidden devices. Your DVD/CD drivers should be visible now. Right click the newly shown drivers and select Uninstall.
Once done, restart your system. Windows should automatically install the most compatible versions of drives once the computer is rebooted. Your problem should be solved.
Method 5: Uninstall IDE ATA/ATAPI Controllers
If the method 4 didn't work then do the following.
Note: Make sure you have followed the method 2 before following the steps given in this method.
- Press the Windows + R keys to open the Run dialog box.
- Then type devmgmt.msc and press Enter or click ok.
- This will open the Device Manager window, displaying a list of drivers/software.
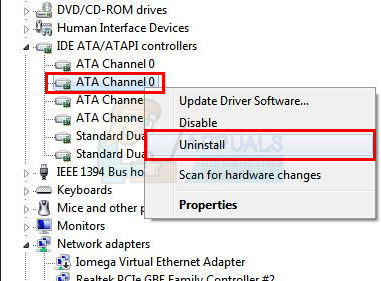
- In this list, find the IDE ATA/ATAPI Controllers and double click it
- Look for the drivers named ATA Channel 0 or ATA Channel 1. You might see just one or multiple of these drivers. You might even see 3 ATA Channel 0 drivers. So, don't worry.
- Delete all of the ATA Channel 0 and ATA Channel 1 drivers by right clicking and selecting Uninstall for all for all the drivers (Within the IDE ATA/ATAPI Controllers).
After you have completely uninstalled all of these software/drivers restart the computer. Windows will automatically configure the drivers and your issue should be resolved after this. Check to see if your DVD drive has returned.
Note: If a restart didn't help then restart again. A lot of users have confirmed that the problem was solved on their second restart.

Kevin is a dynamic and self-motivated information technology professional, with a Thorough knowledge of all facets pertaining to network infrastructure design, implementation and administration. Superior record of delivering simultaneous large-scale mission critical projects on time and under budget.
How to Open Cd Drive on Laptop Manually
Source: https://appuals.com/fix-cddvd-drive-not-showing-up-in-windows-explorer/
0 Response to "How to Open Cd Drive on Laptop Manually"
Post a Comment