Easy Examples of Chemical Reactions That You Have to Show a Teacher
Sadie has been an online writer for over six years. Her articles often focus on how to teach science.
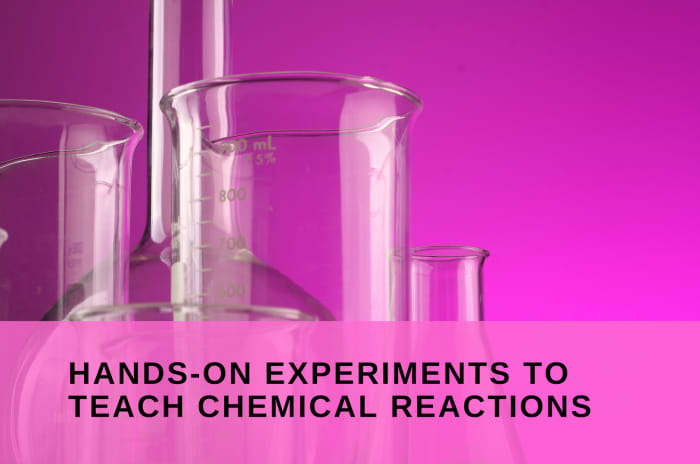
Teaching chemical reactions? Here are some hands-on experiments.
pexels
Chemistry and the Study of Matter
Chemistry can be defined as the study of matter and how that matter undergoes change. That is a pretty boring definition that leaves out all the fun and excitement that comes with studying chemistry.
Chemistry is all around you; it explains baking and why an apple turns brown when cut open. Chemistry is the secret behind some magic tricks and colorful fireworks. So when you teach your students or children about chemistry, move away from using textbooks because this subject is best learned by observation and hands-on experimentation.
Experiments About Chemical Reactions
- Observing the Formation of a Gas
- How a Chemical Reaction Can Produce Heat
- The Formation of a Solid
- The Occurrence of a Color Change
- The Elephant Toothpaste Experiment
- Hot Ice
- Mentos and Coke Experiment
- Separate a Mixture
One note before I move on to the activities. When you do any scientific activities, ask questions, go through the scientific method and have them form a hypothesis, and discuss if they were correct at the end. It's good practice for more advanced science, and it gets the mind working.

Observing gas formation
1. Observing the Formation of a Gas
The first experiment is very simple, showing children how to tell if a chemical reaction has occurred by observing the formation of gas.
Materials Needed
- A bottle
- Vinegar
- Baking soda
- A balloon
- A funnel
How It's Done
- Have the kids place a small amount (a couple of tablespoons) of baking soda in the balloon using the funnel.
- Then have them pour vinegar into the bottle so it is about half full. Very carefully stretch the balloon around the top of the bottle, making sure you keep the balloon down so that the baking soda doesn't fall into the bottle just yet.
- Once the kids have formed their guesses, have them tip the balloon up to allow the baking soda to drop into the bottle. Make sure they hold the top of the balloon so that it doesn't come off.
- Once they have observed the reaction, ask questions. What type of reaction occurred? How do they know? What is inside the balloon?
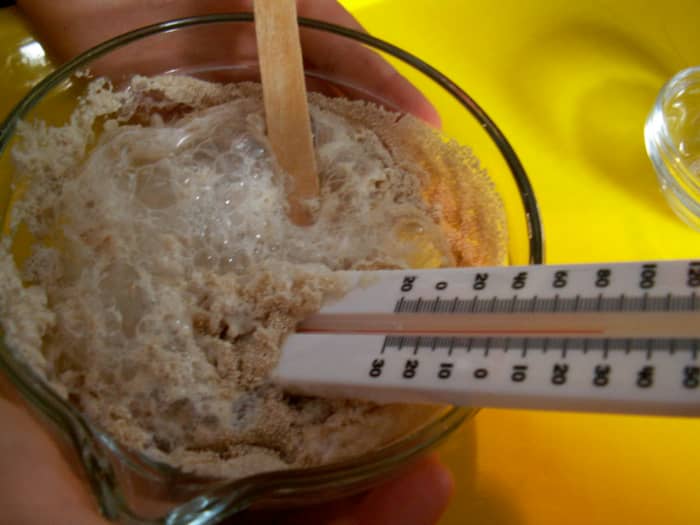
2. Show How a Chemical Reaction Can Produce Heat
Next, we have an experiment that shows how a chemical reaction can produce heat.
Materials Needed
- 1 tsp of yeast
- 1/4 cup of hydrogen peroxide
- A stirring stick
- A thermometer
- A bowl
How It's Done
- Pour the peroxide into the bowl and place the thermometer in the liquid.
- Let it sit for a few minutes until the temperature has stabilized.
- Have the kids record this starting temperature.
- Now have them make their guess as to what will happen and if it will be a chemical or physical change.
- Pour in the yeast and stir. The mixture should start to fizz and bubble, which is a clue to the fact that a chemical reaction is happening, but have the kids keep their eye on the thermometer. They can also touch the outside of the bowl to physically feel the temperature change.
- Have them record the temperature at the end. Were they right? What type of change occurred? What made the temperature rise?

Scroll to Continue
Read More From Owlcation
3. Show the Formation of a Solid
Next up is the formation of a solid. You can also use baking as an example for this- bread is formed and cannot be separated back into flour and water, but this one is more fun.
Materials Needed
- 3/4 cup of warm water
- 1 cup of glue
- A large bowl
- A cup
- An additional 1/2 cup of warm water
- 2 tsp borax
- A spoon
How It's Done
- Adults: Place the 1/2 cup of warm water into a cup and stir in the 2 tsp of borax
- Have the kids pour the water and glue into the bowl and stir them together. Ask them for any observations.
- Then have them stir while slowly pouring in the borax solution (this is a good two-person job).
- Have them keep stirring until the solid forms completely.
- Ask for their observations. Did a chemical change occur? How do they know? This is a fun experiment with a fun outcome, so don't forget to let them play with the new substance for a while!
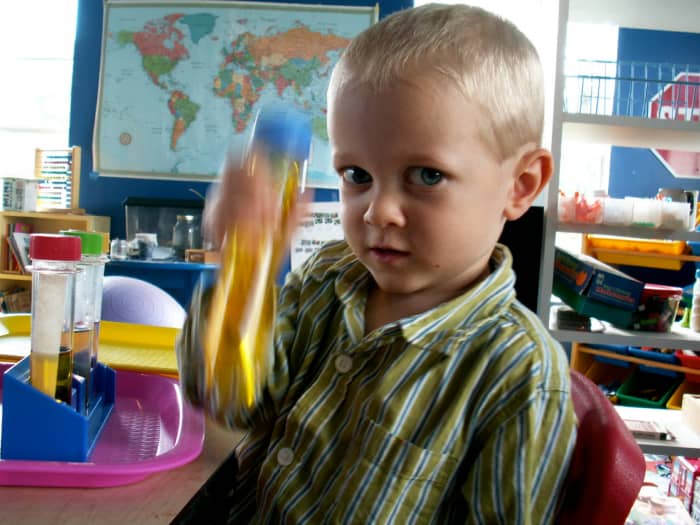
4. Show the Occurrence of a Color Change
The last thing to look for when trying to tell the difference between chemical and physical reactions is the occurrence of a color change.
Material Needed
- 3 test tubes with lids (or any container) filled half full with water
- food coloring
- 3 containers: 1 containing bleach, 1 containing vinegar, 1 containing hydrogen peroxide
- 3 droppers
How It's Done
- Have the kids drop a couple of drops of food coloring into each of the tubes containing water.
- Tell them you are going to add a different liquid to each of the three tubes of colored water, and they have to decide if a chemical change happens or not.
- Have them take one dropper full of the vinegar and add it to one of the colored tubes.
- Cap and shake or stir the tube. Allow them to make any observations before repeating this process with the remaining two liquids and tubes. The bleach will produce a change in color, indicating that a chemical change has occurred.
5. The Elephant Toothpaste Experiment
And finally, here is an activity that can either be done as a demonstration or done by the kids on a smaller scale. It's called elephant toothpaste, and it's even better than the exploding baking soda and vinegar. It also shows an example of a reaction that is both exothermic (gives off heat) and produces a gas.
Materials Needed
- An empty plastic soda bottle (about 16 oz)
- 1/2 cup of hydrogen peroxide ( the 3% version you can get at the store)
- 1 pkg of yeast
- 1/4 cup of warm water
- Dish soap
- A cup
- Optional: food coloring
How It's Done
- Adults: Pour the peroxide into the bottles.
- Have the kids place a few drops of food coloring into the bottles with the peroxide.
- Add a squirt of dish soap and swirl the bottle to mix.
- In the cup, mix the water and yeast and stir for a few seconds to combine.
- Then have them pour the yeast into the bottle with the peroxide and watch what happens!
- Once the reaction has completed, they can feel the foam and observe the heat that was created. What did they observe? What are the clues that a chemical change occurred?
Note: If you want to make this a demonstration, you can use a higher percentage of hydrogen peroxide. You can find 6% at beauty supply stores. And sometimes even higher online. The resulting reaction will be much bigger and more impressive but should be done completely by an adult.
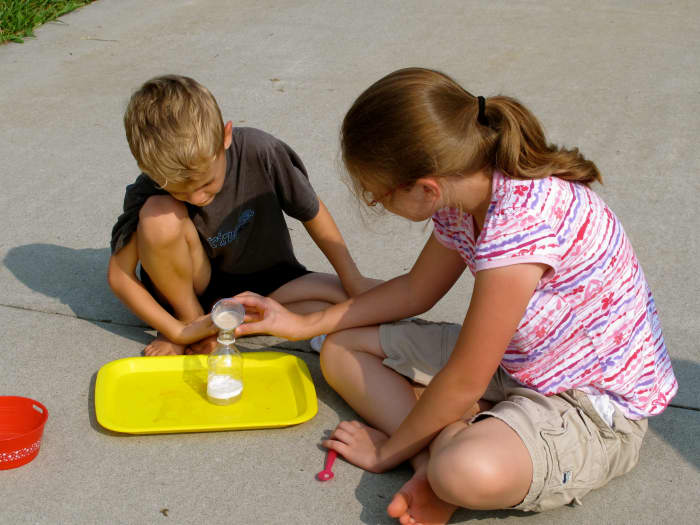
6. Hot Ice
Teach your students how to make hot ice! When vinegar and baking soda mix, they form a chemical called sodium acetate. We refer to this as "hot ice." It's an easy and safe experiment that uses supplies from around the house.
Materials Needed
- 4 cups of white vinegar {acetic acid}
- 4 tablespoons of baking soda {sodium bicarbonate}
- A pot
- A glass measuring cup or mason jar {heat safe glass}
- A dish
- A spoon
How It's Done
- After collecting the supplies, measure out 4 cups of vinegar.
- Pour it into a medium pot.
- Next, stir the mixture until all the baking soda has dissolved and stopped fizzing.
- Boil the solution over medium-low heat for a little over an hour (You'll want to reduce the solution by about 75% or until you have about 3/4-1 cup). If you boil your solution at a higher temperature, it may turn yellow-brownish. Don't worry; the experiment will still work.
- Next, pour the concentrated sodium acetate into a glass pyrex measuring cup and place it in the fridge to cool.
- Then scrape a little of the dried sodium acetate powder off the inside of the pot to use later.
- After about 30-45 minutes, the solution is cool enough to turn into ice. When you first take the solution out, it will still be liquid. The act of pouring it onto a surface turns it into ice. So, grab a glass dish and place a small pile of the sodium acetate powder from the pot in the center (This act as a seed for the crystals to start forming on).
- A pillar of cloudy ice will form. Ask your children or students to guess why this has happened.
7. Mentos and Coke Experiment
Kids love experiments that cause eruptions! Plus, kids love fizzing science experiments. These types of experiments also increase practical life and fine motor skills. The mentos and coke experience is especially cheap, but it is still fun for kids and adults alike!
Materials Needed
- 2-liter bottle of Diet Coke (it's said that the sugar substitute in Diet Coke kick-starts the reaction and gives a bigger geyser)
- 1 package of Mentos (the original mint flavor, the fruit-flavored Mentos are covered in a wax, which means there aren't as many nucleation sites on them)
- A place where you can get messy (like a picnic table outside or a driveway)
How It's Done
- Place the bottle of Diet Coke squarely on a flat surface.
- Open the bottle.
- Drop the Mentos candies into the bottle.
- Stand back and watch the geyser spray!
This is a great experiment to help motivate your students to get used to writing observations. Who doesn't love eruptions?
8. Separate a Mixture
Different types of matter can be combined to form mixtures. Thanks to properties such as size, shape, and density, mixtures can be separated back into their different kinds of matter. This experiment will demonstrate this simple concept to your students or children.
Materials Needed
- Salt
- Spoon
- Coffee filters
- Water
- Cups
- Sand
- Straw
How It's Done
- Stir a spoonful of sand into half a cup of warm water. What happens to the sand? Record your observations.
- In another cup, stir a spoonful of salt into half a cup of warm water. What happens to the salt? Record your observations.
- Stick the straw into the salt water mixture. Take a small sip. What does it taste like? What does this prove about the salt?
- Look at the sand mixture and the salt mixture. How are the mixtures different?Record your observations. Do you think the mixtures can be separated?
- Place a coffee filter over one of the empty cups. Carefully and slowly pour the sand mixture into the filter. Record your observations. What happens to the water and the sand?
- Try the same filtering method with the sand water. What happened? Taste the "filtered" salt water again with a straw. What do you notice about the taste?
- Pour a small amount of salt water into another cup. Set it on a windowsill and observe it every day for a few days. Record your observations. After the water is gone, what is left behind?
What Is a Chemical Change?
A chemical change is when two substances are mixed together to form something new. This differs from a physical change, which is a substance changing physical forms but still retaining its original properties.
Sometimes when a mixture is made, it can be hard for kids to tell if a chemical change has occurred. For example, when mixing sugar and water, the sugar appears to be no longer present, so children assume a chemical change has happened when in reality, the mixture can be separated back into its original substances. There are four main clues that a chemical change has occurred.
4 Signs That a Chemical Change Has Occurred
- There is a formation of gas which can be seen by a fizzing or bubbling
- The reaction will cause heat, light, or odor to be emitted
- A color change is produced
- A solid is formed during the change
These are good questions to have kids ask themselves while doing the experiments to help them to determine if a chemical change has occurred or if it is simply a physical change.
Cool Chemical Reactions
| Chemicals | Outcome |
|---|---|
| Sodium polyacrylate and water | The polymer's ions attract water by diffusion. The polymer absorbs the water within seconds resulting in the almost instantaneous transformation into a gel substance. |
| Diethylzinc and air | Diethylzinc is a very unstable compound. When it comes in contact with the air, it burns to form zinc oxide, CO2, and water. |
| Cesium and water | Cesium is one of the most reactive alkali metals. When it comes into contact with water, it reacts to form cesium hydroxide and hydrogen gas. |
| Calcium gluconate | When it is heated, it causes a huge expansion in the molecular structure. This results in a gray snake-like foam caused by vaporization of water and dehydration of hydroxyl groups. |
| Nitrogen triiodide | After drying the initial components, NI3 forms, which is a very reactive compound. A simple touch of a feather will set off this highly dangerous contact explosive. |
| Ammonium dichromate | When ammonium dichromate is ignited, it decomposes exothermically producing sparks, ash, steam, and nitrogen. |
What Is a Physical Change?
A physical change is when a change occurs, but no new substances are formed. Physical changes affect the form of a chemical substance. However, it does not affects its chemical composition. Mixtures can be separated into their parts by physical methods, such as spinning in a centrifuge or by heating certain kinds of matter (think ice turning into water).
Simple Physical Changes
| Change | What Happens? |
|---|---|
| Ice melting | This is a change from a solid to a liquid and the substances maintain the properties of water because the molecules never change. |
| Dissolving sugar in water | The solid sugar never loses its properties, the molecules become separated by water and the sugar can easily be recovered by evaporating the water. |
| Water boiling | This is a physical change as water molecules vibrate faster, they enter the gas phase and become water vapor. |
| Rubbing alcohol left uncovered | It turns to a gas but maintains the properties of alcohol. |
Sources
- Libre Texts, Feb 18, 2018, "Chemical Change vs. Physical Change"
- Chem4Kids, "Chemical Changes Versus Physical Changes"
- Leraner.com, "Physical Science: Session 4, A Closer Look: Chemical Vs. Physical Change"
This content is accurate and true to the best of the author's knowledge and is not meant to substitute for formal and individualized advice from a qualified professional.
Gatindr on June 04, 2020:
This is bad u can't do it with steps provided. It is a totally different process then information given
on May 04, 2020:
Amazing
Nathaniel on April 06, 2020:
So cool!
ASLKNLKMASLKM on February 18, 2020:
I love this website it is so helpful
Cassidy on February 09, 2020:
I love the whole thing but the poor cuddle fish
sally on January 28, 2020:
omg i love these 5 stars
\
Molly on November 26, 2019:
How is putting sauce on a squid a chemical change? You're just making it scared. Poor Thing :(
sad science teacher on November 22, 2019:
So so sad to see you torturing that poor creature!
Very unethical!
Science teacher on July 29, 2019:
Not happy about the salting of the octopus!!!
cool on April 29, 2019:
COOL
yah boy riley on April 04, 2019:
this is great work
Colette Kussel on February 05, 2019:
As a science teacher, I was horrified when I watched the 11 Fascinating Chemistry Experiments video. Students should, at the least, be wearing goggles and have hair tied back when using chemicals or flames. This video should be taken down and the experiments performed with proper safety precautions.
Lee Roberts on October 20, 2018:
These are cool, but they should have some expirnments that people can use with simpler and less ingredients.
Amanda King on October 08, 2018:
20 Mule Team Borax with laundry supplies at your local store is all you need for the borax.
Gama on September 18, 2018:
i'am going to try these experiments with my kids at home this weekend and if they work well I demonstrate them at school. how cool!!!!
juan on September 18, 2018:
soooooo cool!!! all of them work an are sooo fun !!!
book worm on June 28, 2018:
great expirements....do you have any in the junior high school level?
Geek on April 30, 2018:
Sounds really cool! Really want to try it!
kdog on April 18, 2018:
great experimets
The Pros on April 13, 2018:
We are trying to pick out some projects and this is helping. Here we come 1st place!
cookee nookie on April 04, 2018:
more advanced stuff please
Cool on March 22, 2018:
Where do you get hydrogen peroxide from
.................... on March 13, 2018:
really hydrogen peroxide?
Tiger on March 08, 2018:
cool
Hey itz me on March 07, 2018:
This didnt really help much because most of the experiment have hydrogen pyroxide which we cannot use in school. Not really much help I'd say.
hello on February 27, 2018:
This is so cool to do at home
booya on February 25, 2018:
it's pretty cool but I want something more advance
me on February 13, 2018:
i like the stuff
Ghjjgghh on January 31, 2018:
Good
Ashleyyyyyyyyyyyyyyy on January 25, 2018:
Thank You! This helped.
thomasooooooo on November 15, 2017:
i need more stuff to see!!!!!!!!!!!!!!!
bo on November 09, 2017:
really good
bo on November 08, 2017:
good
Jk on September 25, 2017:
I love it!
storay on March 30, 2017:
I loved all the experiments and i would like to do all of them.
:V on March 01, 2017:
Thank you for the ideas! I didn't find exactly what I was looking for (in my class, we have to design a lab experiment to test the rate of reaction, and I can't find a chemical reaction I can do), but this is overall an informative post. Have a good day :)
Anonymous on March 01, 2017:
@Naruto
it's kind of obvious that you're a child, friend
Naruto on January 25, 2017:
The thing is you need elements in in like titanium and calcium and beryllium oxygen helium and yes im a kid to .
Erin on January 21, 2017:
Doesn't explain what is happening. Like why is it changing colour etc.
Joeleen Jennings on January 05, 2017:
The only problem with this is... where is somebody going to find borax just sitting on the shelf? It's not like it is just at your neighborhood Kroger...
Michael baerga on December 08, 2016:
I mean it's pretty cool but I want something more advance
bad on November 27, 2016:
cool
l on November 03, 2016:
nice
Srinithi on October 18, 2016:
Very good and easy
d on October 05, 2016:
It was nice sharing
adryan on September 15, 2016:
ow you
bopiz zip on August 30, 2016:
i will sure do this with my pupils. thanks
hanz on August 28, 2016:
its defenatly good
CCoker on August 22, 2016:
It should read what is a chemical reaction. Some of the examples given are chemical changes while others are physical changes.
NAMRATA GUPTA on August 03, 2016:
can some give me easy chemistry experiments
Tia on May 26, 2016:
But what is happening in each demonstration and why is it happening?
Turtle on October 23, 2015:
Exciting !
Katia torres on October 07, 2015:
Good
Shankar Ganesh Radhakrishnan from Chennai, India on May 25, 2015:
Cool stuff, indeed! Liked the elephant toothpaste part :) I'm sure gonna try and impress my 3 year old kid with these amazing experiments.
Wonderful hub. Keep going!
Brandon Hart from The Game on February 02, 2015:
I remember when I was shown the experiment shown in example #1. I was amazed that the balloon filled up on its own.
Seth on October 14, 2014:
this is a great hub as an early childhood
Angie Shearer from Whangarei, Northland on September 17, 2014:
This is a great hub as an Early Childhood Teacher I will be using these activities with my older children..thankyou for making science interesting and fun and translating the scientific processes int layman's terms....I found this to be a very useful and interesting read voted up
Kalaichelvi Panchalingam from PETALING JAYA on June 12, 2014:
As a teacher I can say for sure that kids learn best by doing. They remember better and are able to retain concepts when they experience the concepts taught. Great hub. Thanks.
austin on April 11, 2014:
i love this site
biochemi on January 19, 2014:
So funny and interesting. Children studying in school level may really enjoy chemistry when such things are taught to them.
Patrice M on October 26, 2012:
Very nice hub! Detailed, acurate and completely kid -friendly. Thanks!
hyddie lopez on September 26, 2012:
these experiments are off the hook amazing...
Cali123 on September 24, 2012:
Great, concise, explanations and super experiments. Note: I just noticed that in the section titled "What is a chemical change," right before the list of four clues, it should read: "There are four main clues that a CHEMICAL change has occurred."
sadie423 (author) from North Carolina on June 30, 2012:
I hope you give them a try to that your kids enjoy them! I know mine did
culinary traveler on June 29, 2012:
You've got me excited about trying these experiments with my kids! Thanks for sharing!
Source: https://owlcation.com/stem/hands-on-experiments-to-learn-about-chemistry
0 Response to "Easy Examples of Chemical Reactions That You Have to Show a Teacher"
Post a Comment